
You should give it a try. It is really simple and you can have a stash of gorgeous papers to use in a multitude of ways.
Here's what to do:
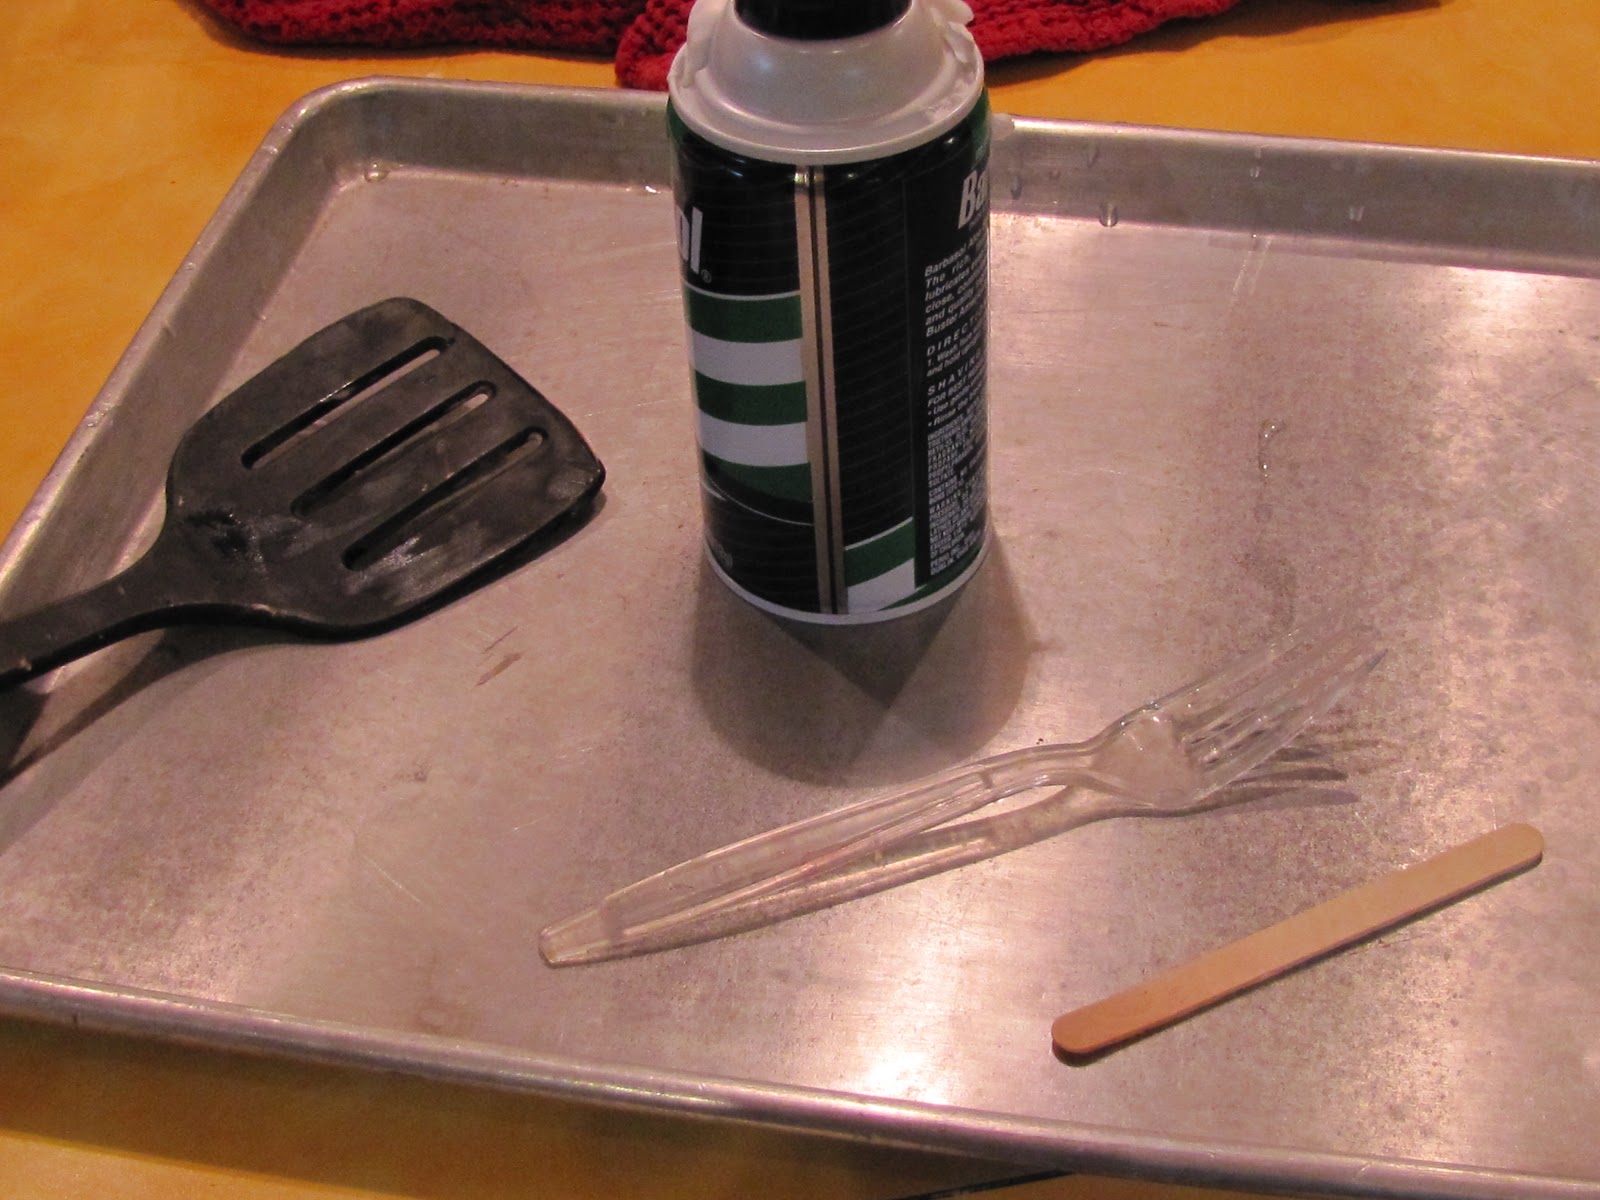
- paint or inks ( we used inexpensive acrylics)
-paper ( watercolor or sketching paper)
-shaving cream (men's is cheaper and we usually try to get unscented or anything but menthol)
- tray or cookie sheet (or you can also use foil or waxed paper)
- spatula for scraping shaving cream
-forks, sticks, and other assorted tools to swirl ( it's fun to experiment with different things)
We cut our paper in half. It makes it easier to handle, especially for children. One you get the hang of it, it is easy to do a whole page. And of course, the heavier the paper ,the easier it is to do a whole page at one time.
1) Squirt your shaving cream on the tray about the size of your paper. Please allow children to do it themselves, this is a fun part ! Spread it with a knife if there are gaps.


That way you will have many papers to use in the future from the one batch of shaving cream and paint.


You can tell when you don't want to use it anymore. It starts to get cloudy.

Anything is possible!
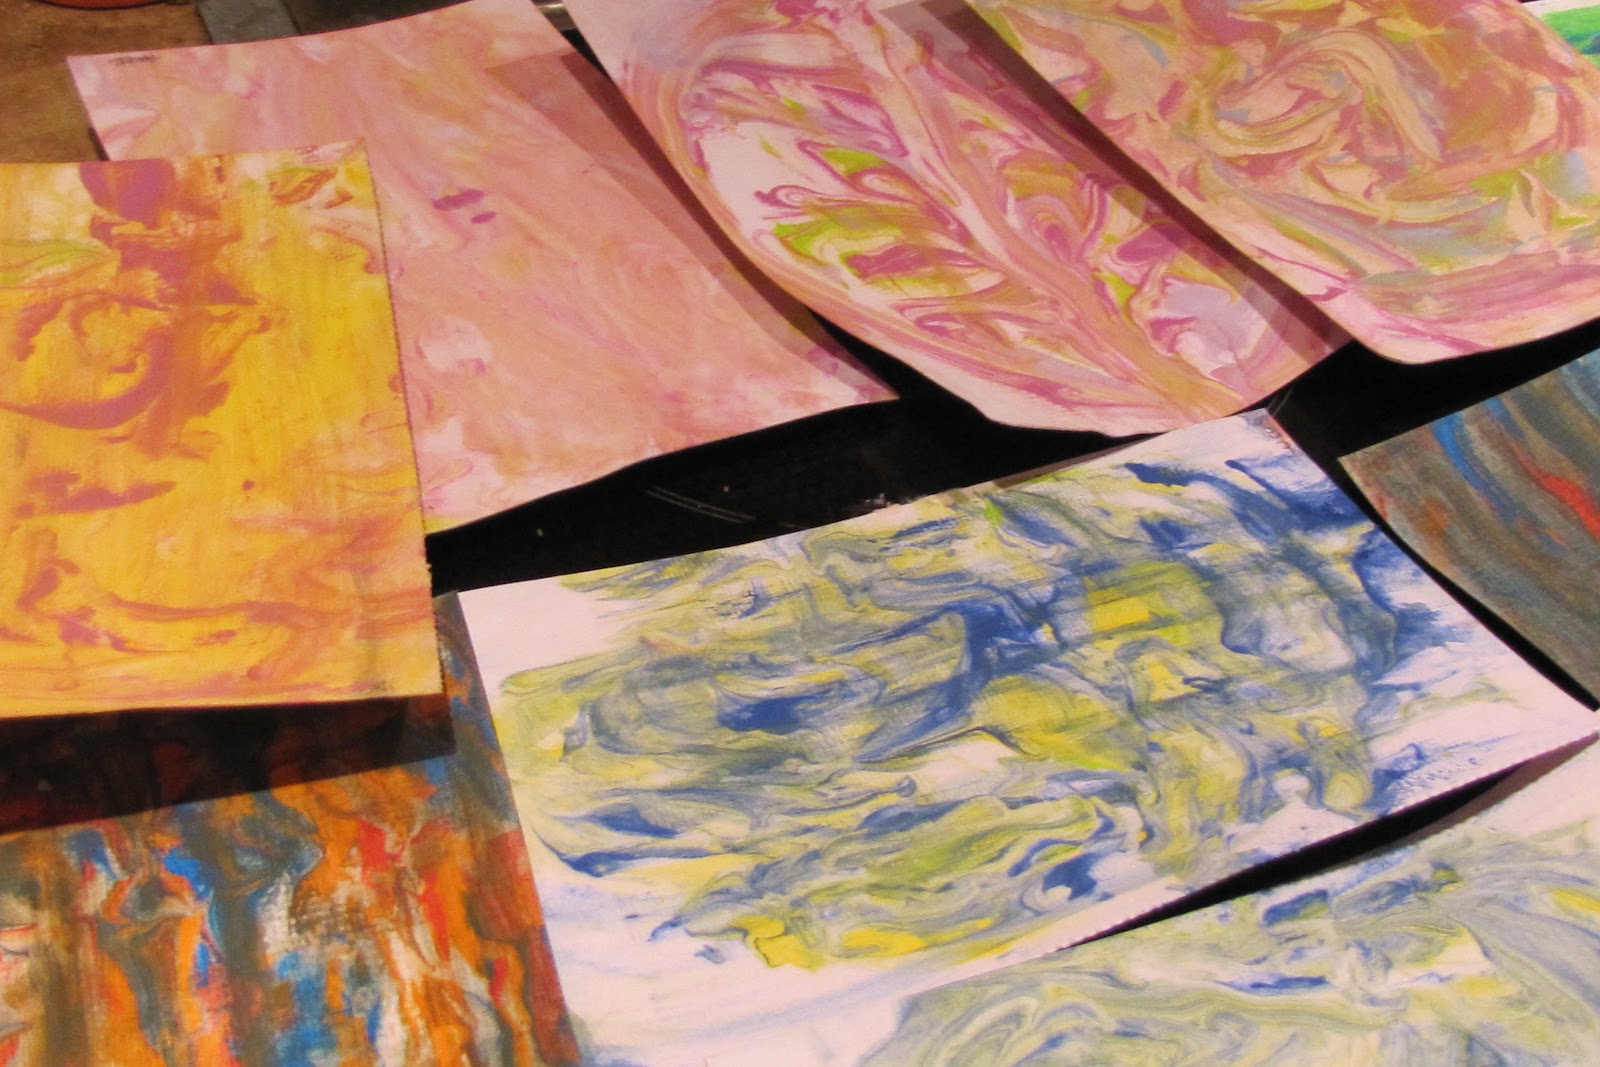
Stay tuned for what we plan to use all our marbleized paper for. Ssssh It's a secret! But for now you can view the gallery of paper the children made. Beautiful!
The Gallery of Marbleized Paper


Did you notice the grey one? That was the last of a batch when all the colors got mixed together. The grey is still beautiful though. A nice background for something special.
happy day, happy marbleizing!
5 comments:
Oh, that looks like so much fun. We are going to have to try this one day.
These are gorgeous; I'll have to try them!
I'm so sorry I forgot to mention your bird haven in my blog post. I think that's probably what lit the fire to get me going with Lucy's bird-watching station this week! I just love what you did; so smart!
Wow that's amazing - who would have thought! Makes me wish my husband shaved so I'd have some shaving cream in the house - I'd be out in the studio playing right now! LOL
That was awesome and fun. I can't wait to do this. I hope don't mind I'm going add alink to this post on my next Monday list.
For now I'm adding shaving creme to my grocery list.
Thank you everyone. They also make great holiday cards, gift tags or thank you notes!
Lise, no apologies necessary! Happy you were inspired.
Luisa, feel free to link,sharing is what it's all about :)
happy day!
~marcia
Post a Comment